Changing this one Google Photos setting solved all my Pixel storage issues
I’ve been on a mission to curb my digital hoarding with my Pixel 10 Pro and Google’s apps and services.
First, I removed as many unnecessary images as possible by using Google Photos’ Stack Similar Photos feature and manually deleting countless duplicates, blurry photos, and screenshots, freeing up roughly 50GB of my Google One storage. It felt great to get rid of all that extra digital cruft, but I knew there was still work to do. Next up in my digital spring-cleaning, as far as the Photos app is concerned, is turning on Storage Saver mode.
It’s a super obvious setting, but it’s easy to forget it’s an option, especially if you’re like me and don’t realize how capable it really is.
Turning on Storage Saver mode only takes a few steps
There are some downsides you should be aware of, though

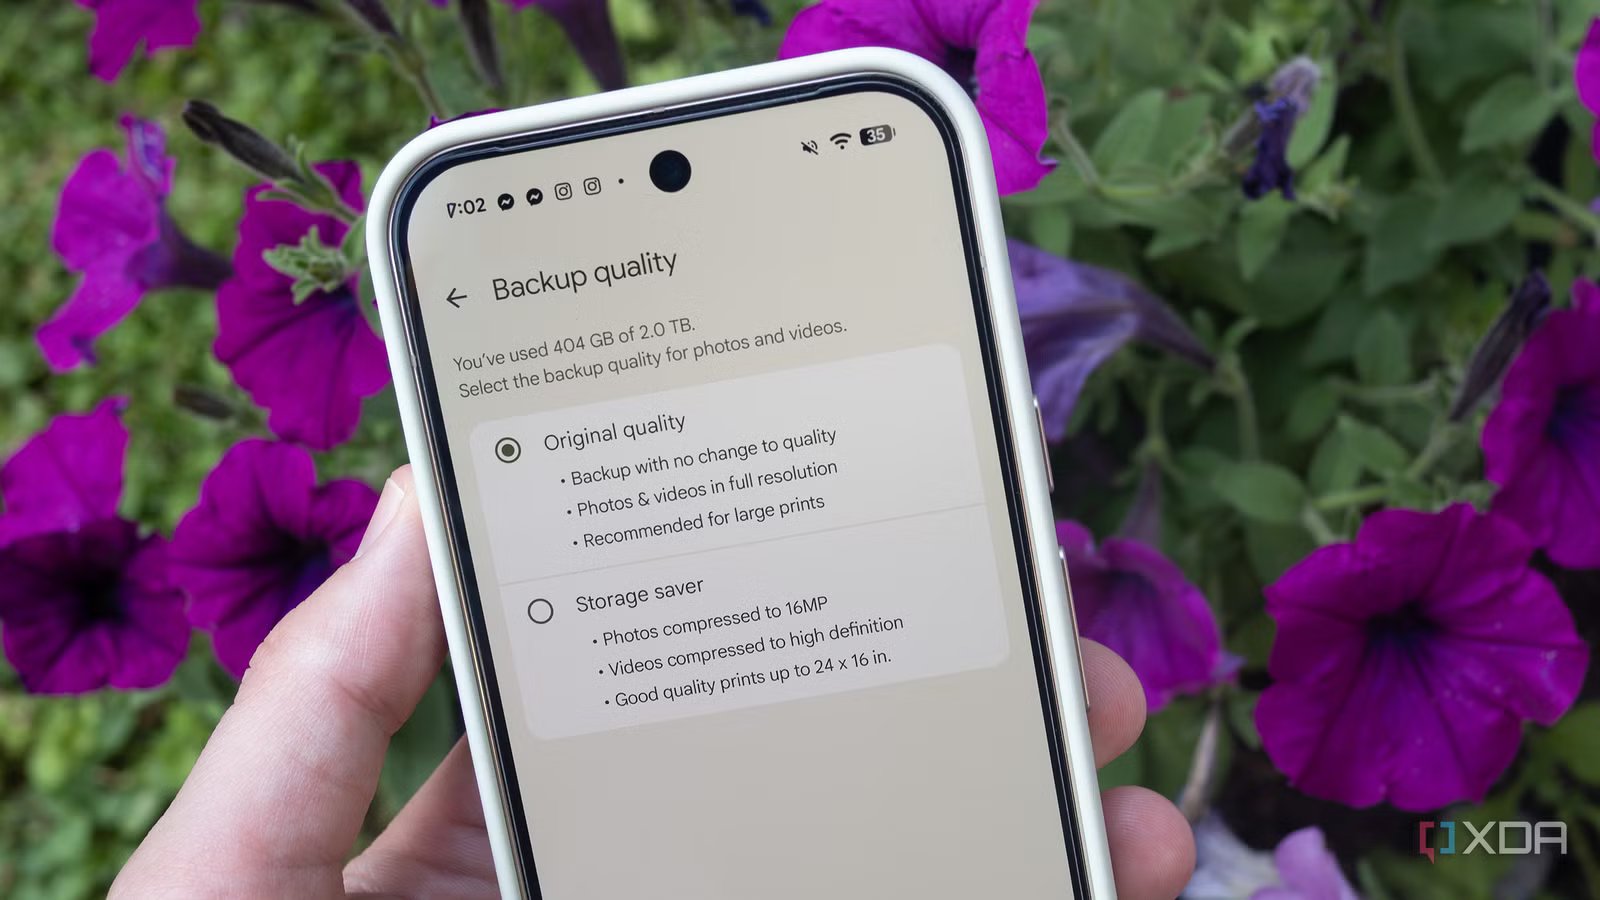
To find Storage Saver, I navigated to my Google Photos app on my Pixel 10 Pro, went to my profile, then Photos Settings > Backup > Photos & Videos Quality > Storage Saver. With Storage Saver on, every image I back up in Photos moving forward is compressed by Google’s algorithm, reducing all new images to 16-megapixels. Most Android devices, including the Pixel 10 Pro, already shoot at 12-megapixels by default, so you’re not really missing much with this feature enabled.
That said, there is a more pro-focused photography setting that lets you use the Pixel 10 Pro’s 50-megapixel sensor without pixel binning down to 12-megapixels, but you need to enable it manually. If you use this mode frequently (or similar high-resolution photography features on other Android devices), all images will be automatically compressed to 16-megapixels when you turn on Storage Saver.
With this in mind, if you care about photo quality and do a lot of close-up cropping or printing of photographs you’ve shot, Storage Saver isn’t a feature you’ll want to turn on. In my case, I don’t really shoot anything that’s work-related with my smartphones, including the Pixel 10 Pro. My mobile photography is of my son, trips, and friends/family — all images where I care more about just capturing the moment with the camera I have on hand, than the quality. For photography where I care about image quality, I use my Olympus OM-D E-M1 Mark III and edit the photo in Lightroom CC.
I don’t shoot much video with my Pixel 10 Pro, but it’s important to note that Storage Saver will also reduce all high-resolution videos to 1080p. This is fine with me, since most of the video I shoot with my Pixel 10 Pro is in situations where quality isn’t a concern. But, just like with high-resolution photos, if crisp 60fps 4K video quality is something you care about, Storage Saver isn’t for you.
You can also compress photos and videos you’ve already uploaded to the Photos app
I wish I had known about this feature years ago

Part of why I’ve waited so long to turn Storage Saver on is because I assumed it would only work with new images and videos I shot moving forward. Thankfully, I was wrong. Google offers a way to claim back all that space in your Photos library by compressing large video files and high-resolution photos you’ve already uploaded to the photo storage app. To do this, I navigated to Google Photos on the web. Next, I headed to Settings > Manage Storage > Recover Storage > Convert Existing Photos & Videos to Storage Saver. Next, I clicked Learn More (it’s on the right side) and accepted the agreement box. Lastly, I clicked Compress Existing Photos and Videos. It’s very important to note that this process can’t be undone.
You’ll likely need to wait several hours while Google Photos compresses high-resolution images and videos in your Photos library in the background. In my case, the process finished overnight, but it really depends on how many photos and videos you have in your library. For example, if you only have 10-50GB, which is far more common (I have something ridiculous like 188GB of photos and videos), it’ll likely take between one to three hours, depending on the quality.
To be clear, Storage Saver isn’t a silver bullet if you’re trying to drop to a lower Google One tier to save a bit of money. In my case, it only freed up roughly 32GB of storage space. That said, I have a very photo-heavy Google Photos library. If you have more videos than photos stored on your device, you’ll likely be able to free up much more space.
I’ve long since smashed through Google’s initial free 15GB storage limit, and while I’d love to get my storage down to 100GB or less to drop down a tier from my current Google AI Plus plan, I don’t see that happening. Still, like manually getting rid of doubles, screenshots, and random photos I accidentally snapped of my fingers, Storage Saver and Compress Existing Photos and Videos helps me clean up my Photos library in a meaningful way.